PBR Map Quick Design Tricks 1 of 3 : Start with a Free Blender Add-on
PBR map design workflow centers around a good, logical height map. For game, VR and real-time 3D shader design, it is always worth trying to build a shader using the minimal additional map number in order to make an efficient pipeline using minimal texture resources. Not only does it
lighten the hardware and download impact, it can save you time.
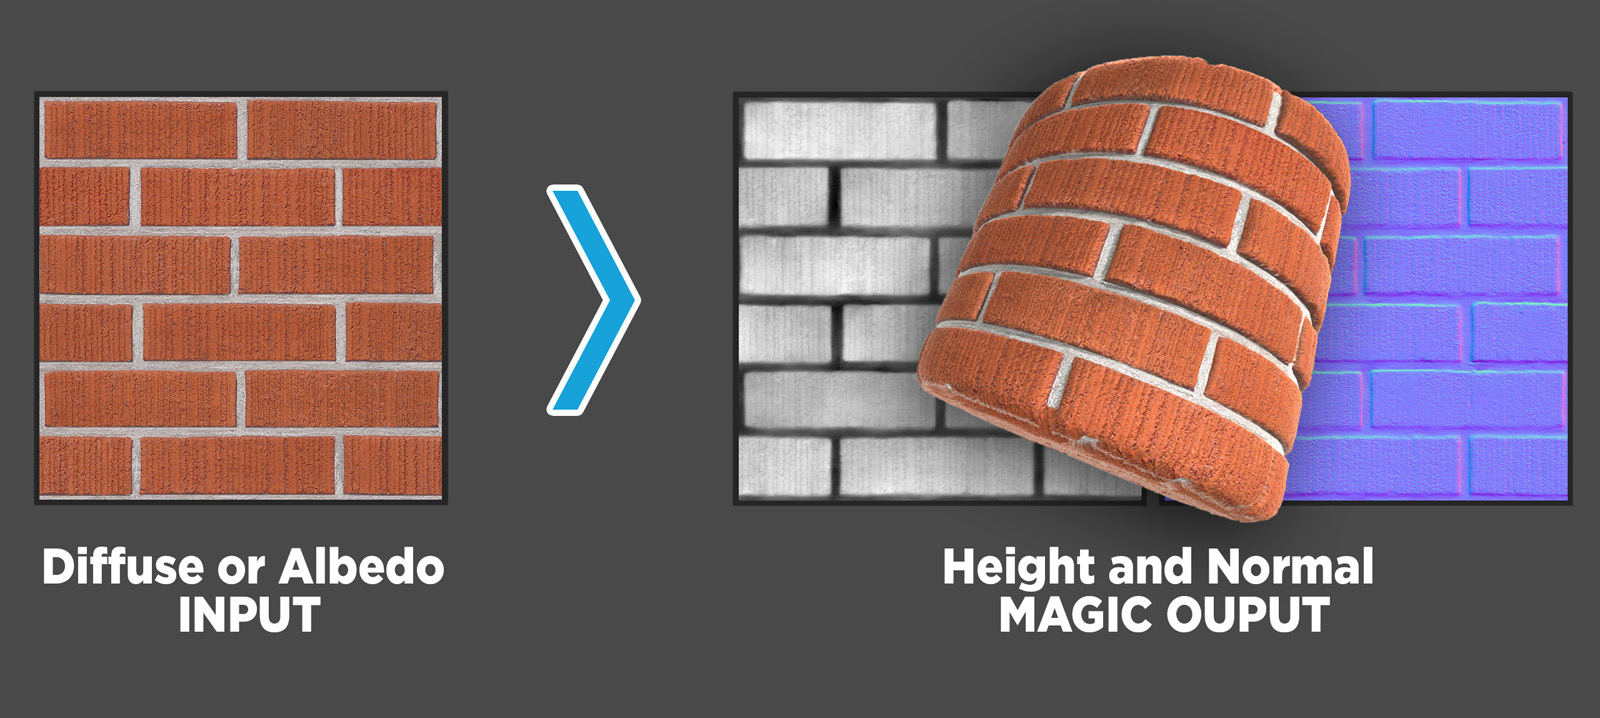
All you need is a Diffuse or Albedo map and the DeepBump Blender add-on.
Texturama textures have been tailored to thrive in real-time environments without
PBR shaders, however they also perform very well when layered in a full shader process for ultra-realistic rendering environments. We call our color mastering a
"Hybrid Diffuse-Albedo" approach.
It is a balance between diffuse and albedo.
This three part series is designed so you can quit whenever you like.
Part 1: Create Normal and Height Map automatically with DeepBump
Part 2: Fine-tuning the Height Map from DeepBump for more accuracy in Photoshop
Part 3: Creating a full PBR map design suite in “Materialize” from our updated DeepBump Height Map
DeepBump is pretty darn smart from training via Midjourney
Enter “DeepBump”, a free add-on for
Blender3D that creates normal and height maps from single texture photos.. This is the foundation to a quick process, and in some cases may be all you need for a realistic material. This tool passes the “brick with white grout test” due to the fact that it has been “trained” by using machine-learning on a large dataset of real-world image textures, photogrammetry and procedural materials.
Download and installation instructions from HugoTini DeepBump on GitHub
More free texture samples available here:
"The White Grout" Bump Challenge:
The white grout test is the classic diffuse-to-bump paradox. Until now, a typical conversion route would result in the white grout making the bump stick out, in an opposite fashion to reality. Also traditionally, one would just INVERT the bump map to make the white grout go inwards. If this hack is used, then the ordinary dark features that should behave as grooves will act inappropriately and then bump OUTWARDS instead of properly rendering inwards.
The DeepBump PBR Map Design process is this:
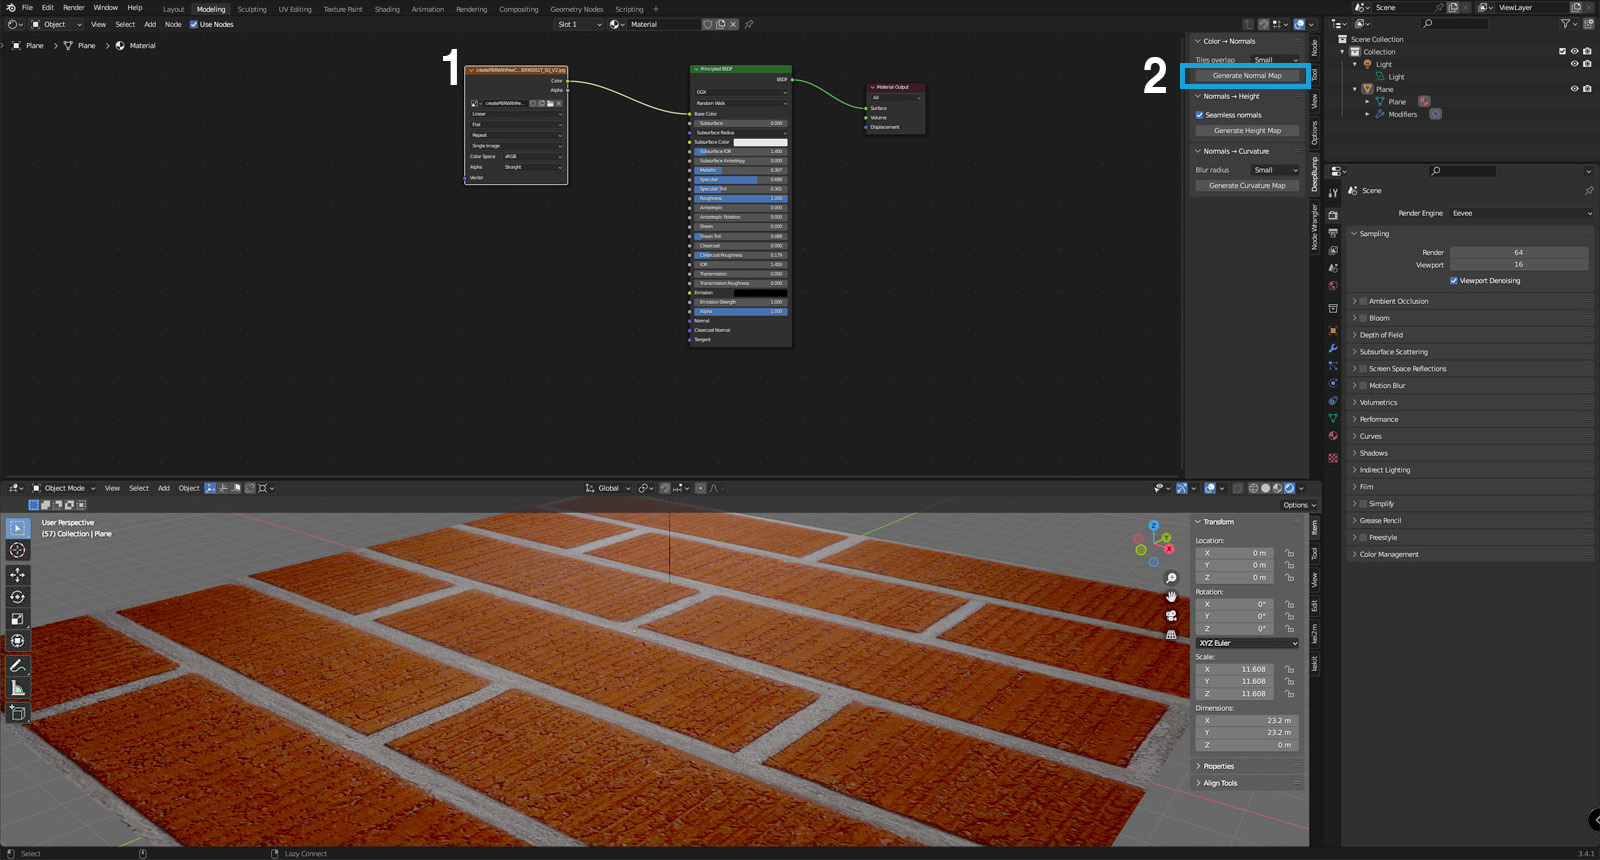
1A :: Set up blender file with top: shader editor, bottom: object mode UV plane and light
1B :: Assign material and add BaseColor texture with your source diffuse / albedo map
1C :: In the shader editor, click on the BaseColor node
2 :: DeepBump tool buttons become active. If your texture is already tileable, choose Tiles overlap “small”. Then click “Generate Normal Map” . Since the tool evolved around the core feature of creating Normals and then later converting to Height Map.
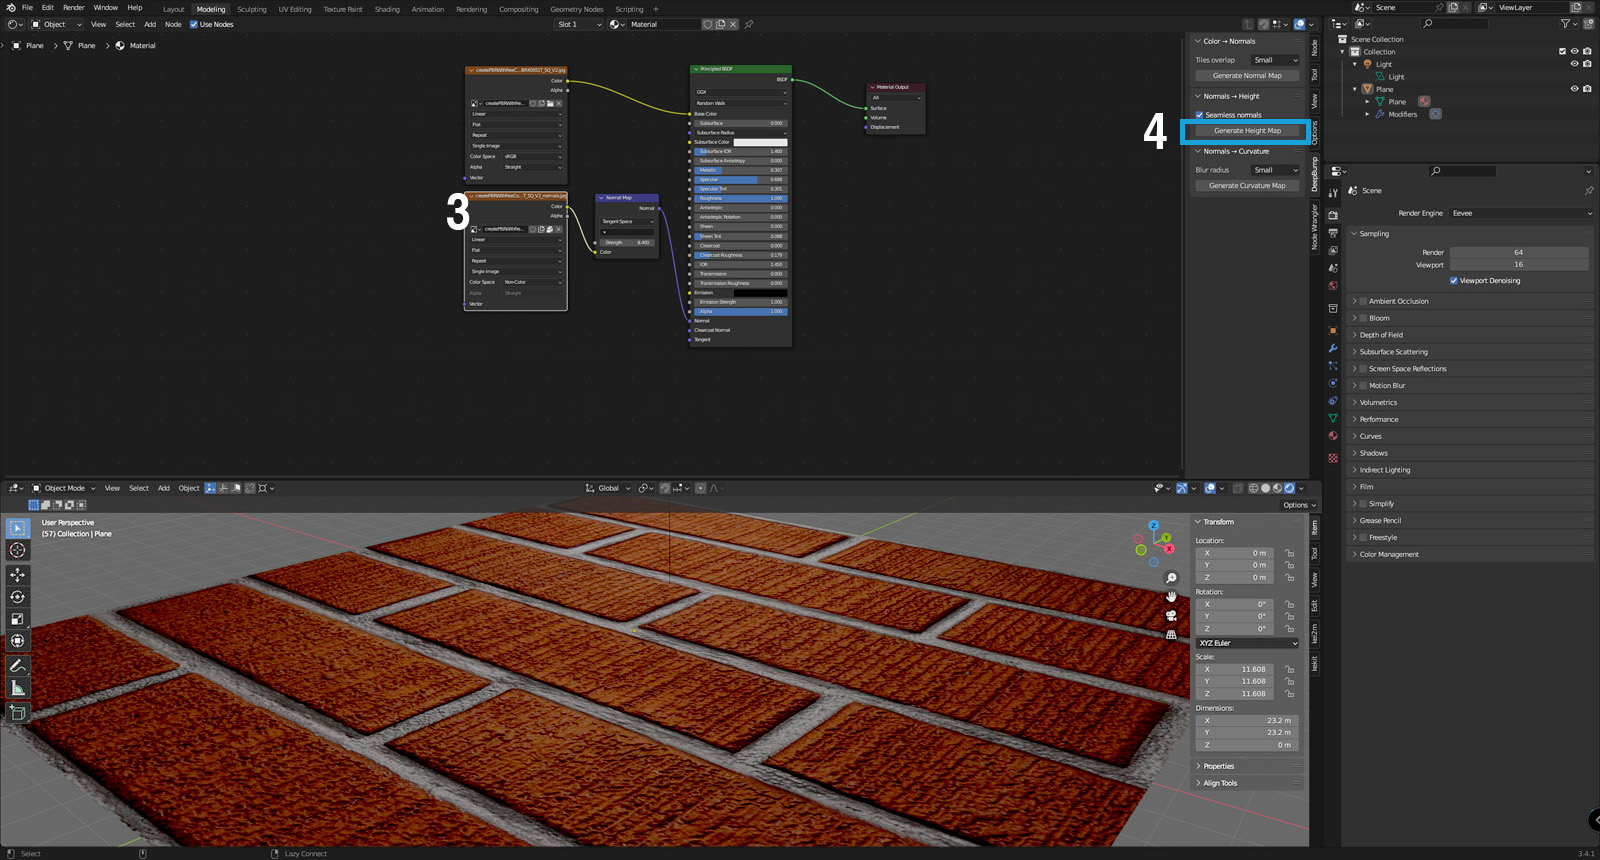
 3A :: The normal map is created
 and then it is automatically added to a new node that is wired up to the normals slot in the material. You can see the result in the 3D viewport
3B :: Click the Normal Map file node to select it.
4 :: Click the “Generate Height Map” button.
 5 :: Add a displacement node
 then wire it up to the “Material Output” node.
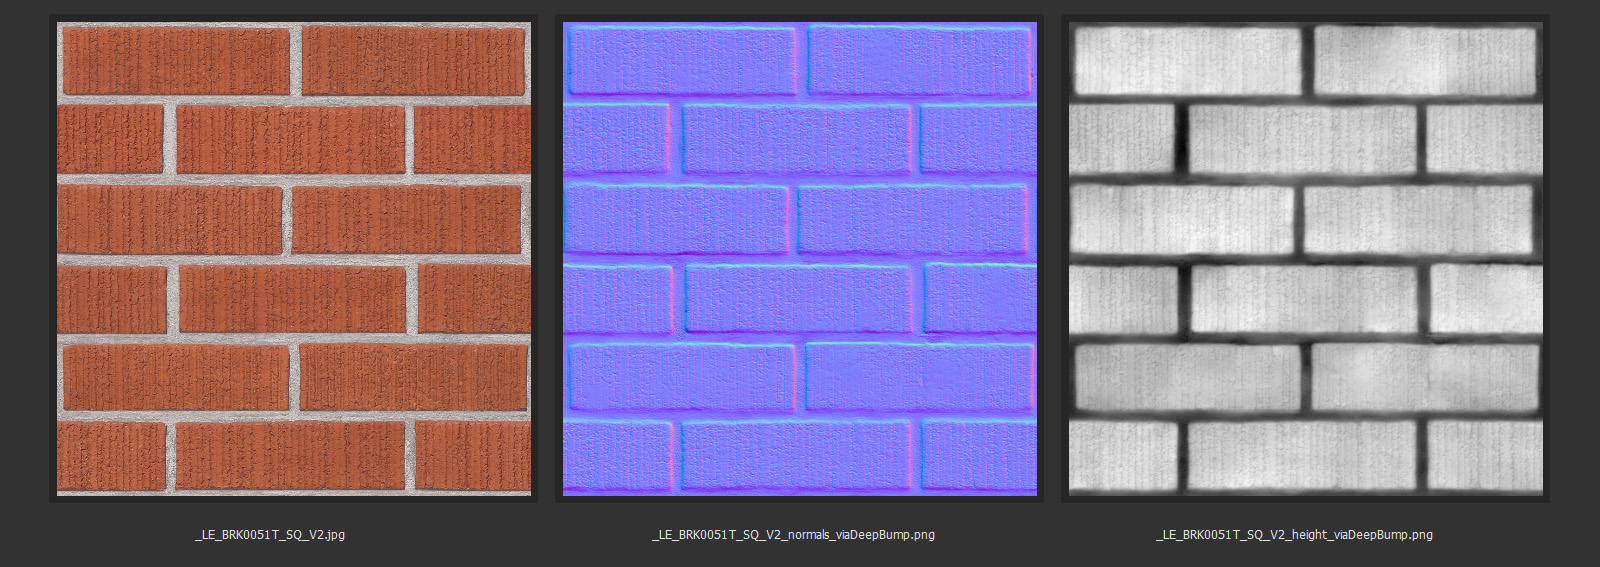
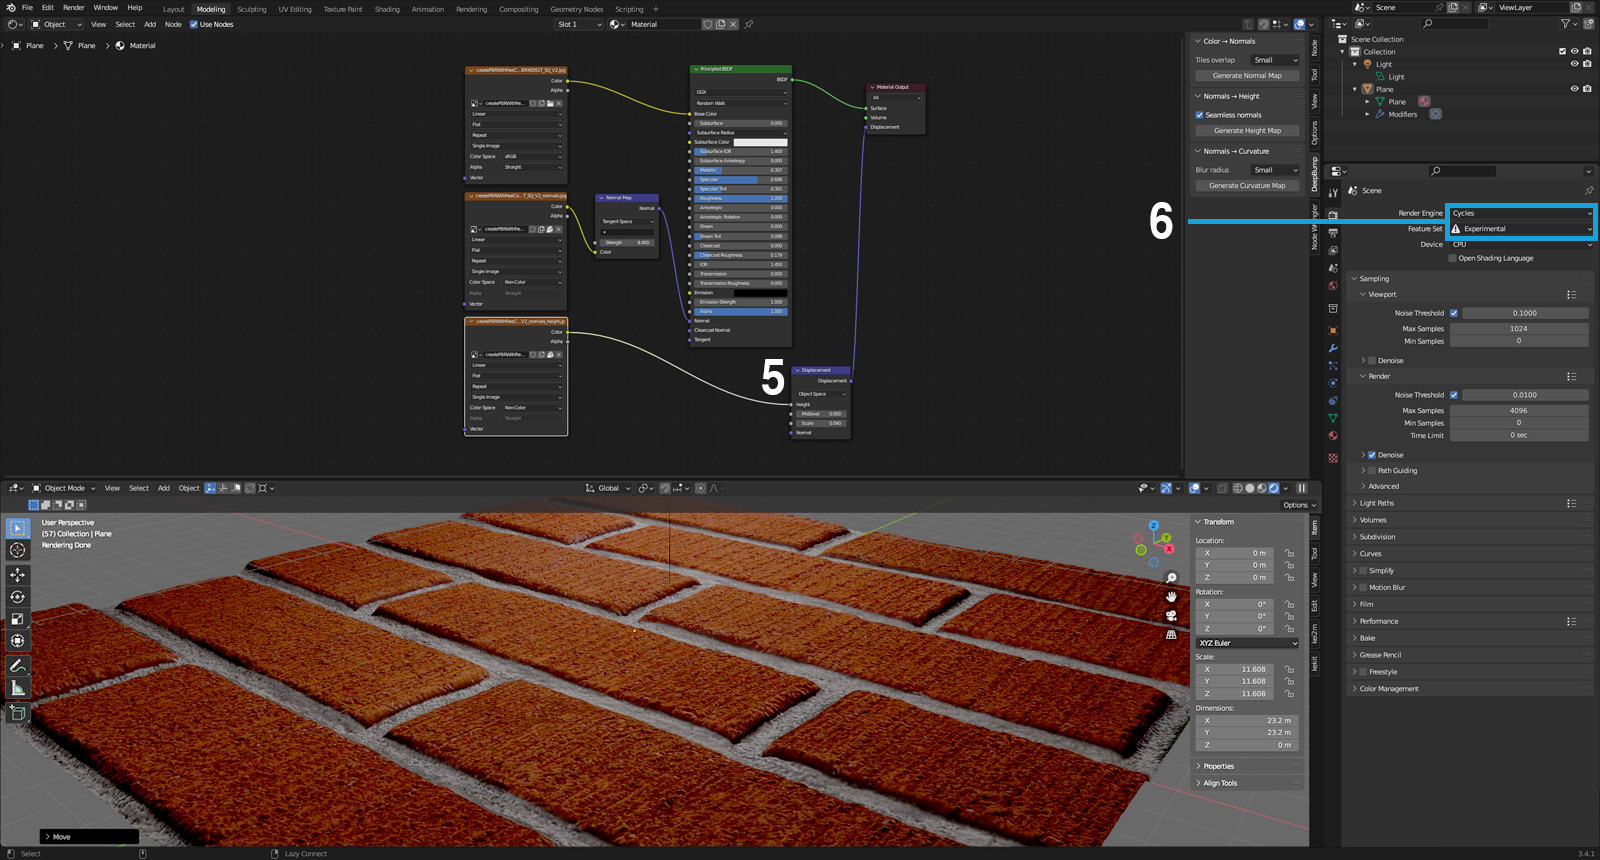 DeepBump was smart enough to convert the white grout into a negative direction (or recession) while intelligently rendering the dark finer surface grooves also as a negative direction.
Here we have live, on-screen displacement and normal maps behaving as they should. The dark micro-grooves are recessed but magically, so is the light macro-groove of the grout!
The most obvious flaw with the height map, is that the brick edges are softer and rounder than reality. Notice the blurry and soft grout edges in the DeepBump Height Map output below:
If you are happy with these results, great news you can stop here and reduce the digital overhead of your project. Two or three maps only needed for this quality, pretty nice I think. You can also try to use the newly-created height map or its inverse colors as metallic or as shiny map.
If you need to develop more realism, please continue to:
Part #2 of 3 - Using Photoshop and/ or Blender 3D to Perfect the Height Map
Part 2 uses Photoshop selection tools to isolate and flatten (or to control the level) of a certain feature of a height map. In this case, it will be selecting the grout area, and sharpening the edges so that the grout is more defined and more level, as a professional mason would strive to create.
Part #3 of 3 - Materialize, a Free App to Create PBR maps
Part 3 of this series features
“Materialize”, a free app that creates the remaining maps of a full PBR creation workflow. Materialize picks up from this first step, and uses the height map as the foundation of its logistical process for all PBR maps. It may be good to check the series Part #2 to in order to perfect this height map if Part #1 isn’t up to par.
Thank you, HugoTini!
Many thanks to
HugoTini DeepBump on GitHub
